Written by:
AuctionNinja Staff
June 26, 2022
Updated 04:06 PM
June 26, 2022
Updated 04:06 PM

Photography can make or break a sale. Let’s face it -- most bidders are not going to read your catalog descriptions if they are not first intrigued by your imagery. That's why taking great photos of your inventory is critical in order to attract the most buyers and get the best possible sale price for your items.
Here are our top 10 tips for great online auction photography (whether you’re on a smart phone, tablet, or professional SLR):
-
Be sure to remove clutter and/or garbage from the photography area. Paperwork, electrical wires, shopping bags, dust pans, etc. that are not part of the lot should not be part of the image. (Remember the pan photos from our "The Power of the Photo" blog we wrote a while back? You didn't notice the brand-new label still on pan in the left photo, as compared to the clean background on the right where the star of the shot is the pan itself.) Clutter and/or garbage in the background only make your photos look messy, unappealing, and quite unprofessional. Two seconds of extra work can pay for itself, plus extra dividends, with higher sales prices realized.
-
Get Low Using your legs to get down and capture the item head-on is almost always more interesting than shooting it from a 45 degree angle standing at full height. (Again, reference the pan photos above.) If head-on still doesn’t get you the best shot, position the piece at a slight angle and try shooting it that way.
-
Lighting is king! Make sure you have proper lighting. Often, natural light (soft, not in direct sunlight) is best. So, if it’s possible, bring some items outside to shoot. Alternatively, pull back all window treatments from the windows to let as much natural spill into to the room as possible. Also, turn on all the lights in the room. Extra tip: DO NOT SHOOT ANYTHING IN FRONT OF WINDOWS IF POSSIBLE — If the light from a window is too bright it creates "back-lighting" which will almost always create a dark, shadowed image. Make sure the source of light is behind you as you shoot.
-
Let the object(s) in the lot fill the entire frame. You’re selling the object, not the space around it.
-
If you’re shooting with a smart phone (i.e., iPhone), make sure that you hold the phone in the horizontal position, not vertical, when taking photos. This will allow your photo to fill the entire frame on the AuctionNinja website and will collectively be a much more aesthetically pleasing visual component to your entire sale.
-
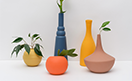
Display scale. Sometimes it’s hard to discern an item's scale or sizing in images. Use models, rulers, coins, or hands for scaling when needed to help the bidding audience understand the true size of an item. (Yes, you should still include dimensions in your description, but visual scaling will almost always reflect in a better overall selling price of your lot.).jpeg)
-
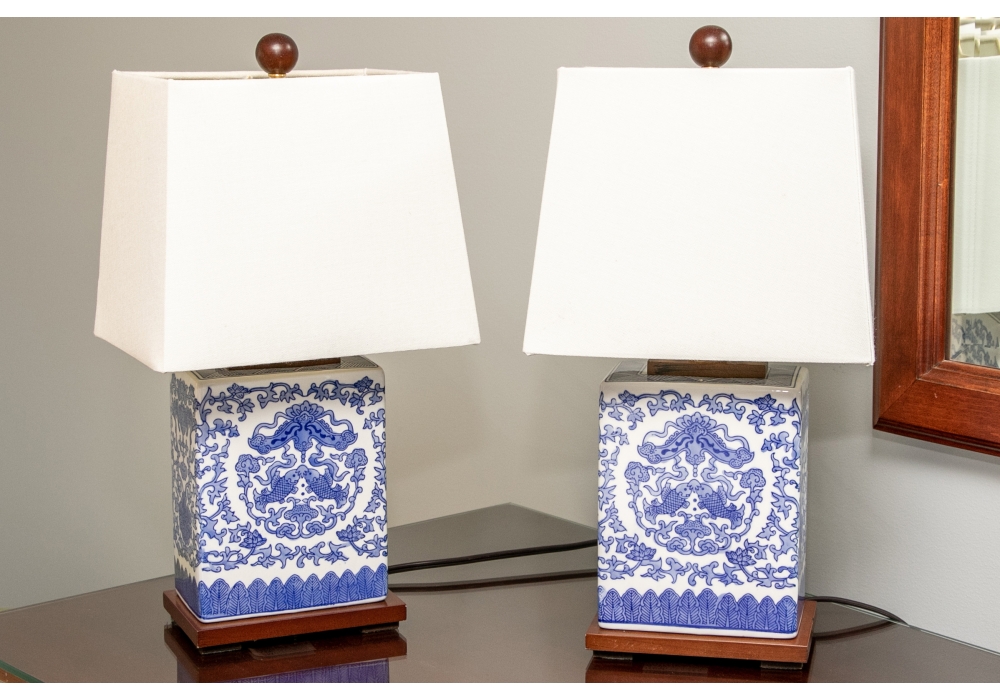
Each listing should have one main featured photo and at least two other/secondary photos. Obviously, a lot which is worth only $25 may only require a few images of varying angles and perspectives. A lot valued at $10,000 should have enough detailed photos commensurate with its valuation. General photos and detail shots should depend on the condition, complexity, and overall value of the lot. For example, a basic decorative vase which originated from Home Goods a few years ago may only need four shots: front, back, bottom and top. Conversely, a 17th century intricately embossed sterling silver bowl may need 10-15 photos showing the top, bottom, close-up of maker’s markings, close-ups of the various carvings, side shots showing the depth of the carvings, detailed condition shots, etc.
-
Don’t try to hide imperfections (i.e., scratches, dents, chips, etc.) in your objects. As an AuctionNinja seller you are expected to be as transparent with the bidding audience as possible. Since the photos are part of your description, it’s important to show imperfections to your bidders. It'll help in the long-term too with fewer post-auction calls from disgruntled bidders who feel as though they've been swindled because of a lack of disclosure. Be honest and forthcoming at the start -- it's the best way to do business.
-
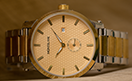
Feel free to get a little “artsy” for your overall sale’s main photo. Sometimes an interesting close-up showing only part of an object is much more enticing and interesting than a whole object. Doing so, can also break-up the monotony of many otherwise "cookie-cutter" photos on the platform. We don't, by any means, suggest that every item has an "artsy" shot. Be judicious about it and use the occasional interesting angle/close-up as a "teaser" or lead-in which invites bidders to look at your overall sale.
-
Put yourself in you bidders’ shoes. What would you want to see if you were bidding on these lots? Shoot those angles and shots.
Now, let's see these tips in action. Take a look at these examples. If you were a bidder, which one would appeal most to you?
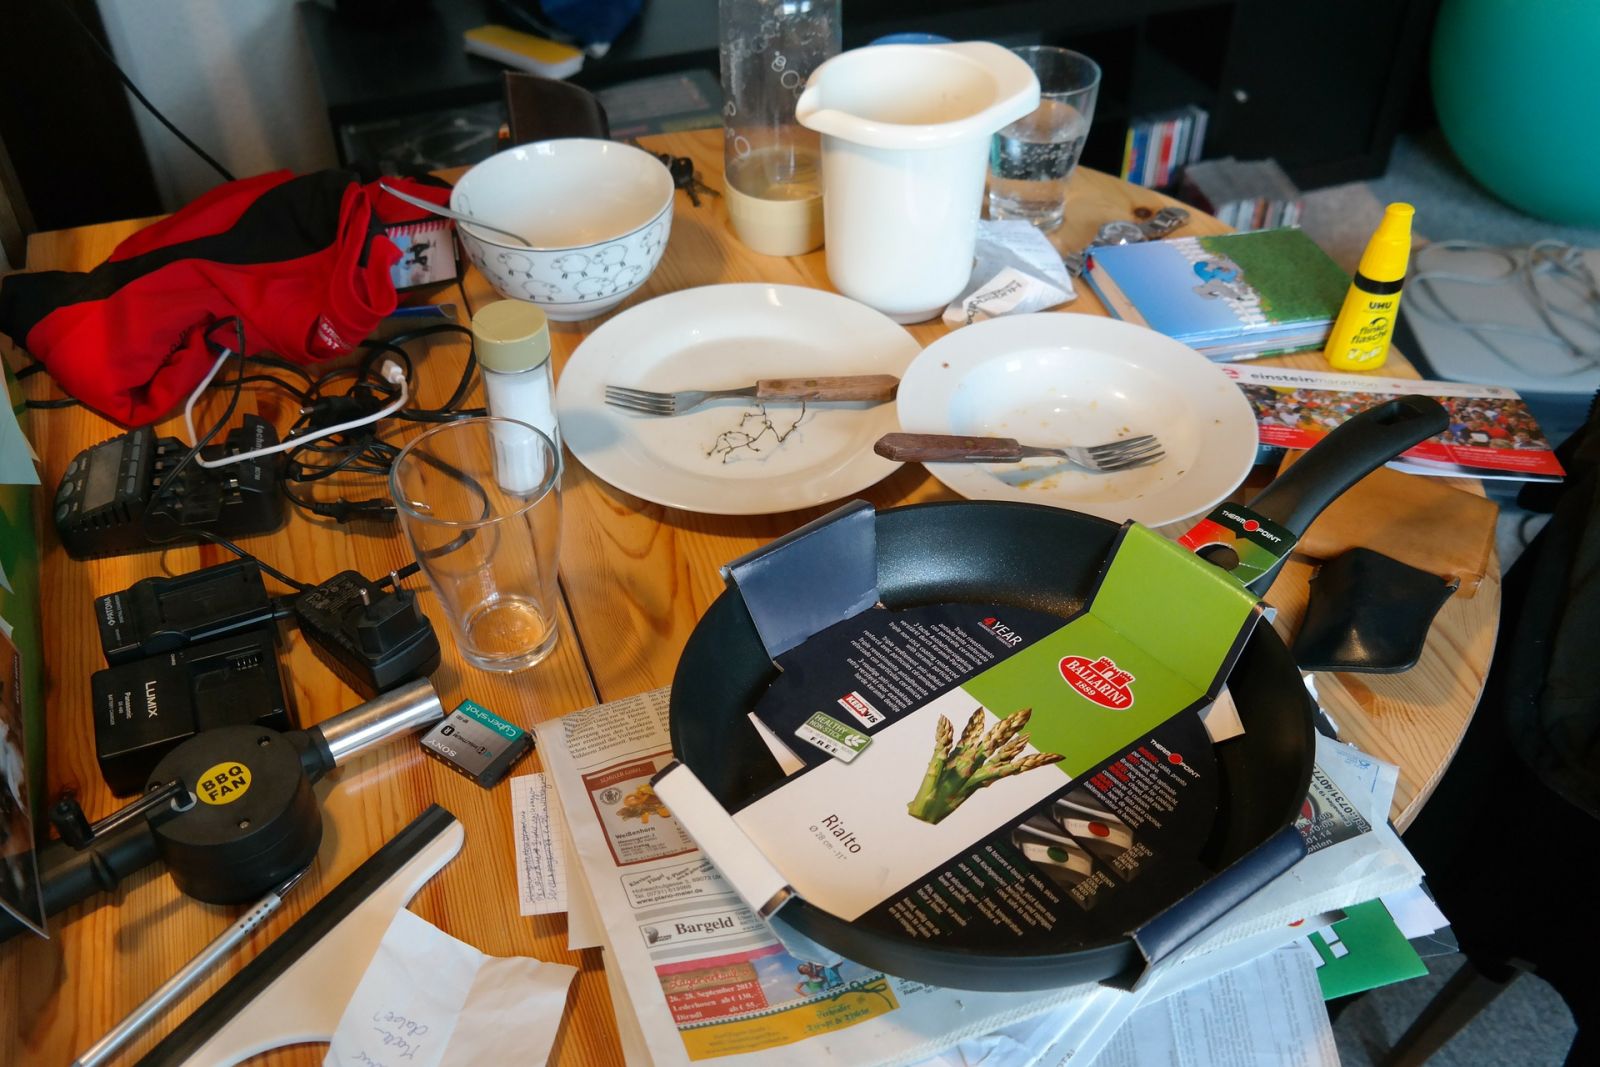

Did you even notice the brand new (still in original packaging) pan on first glance among the clutter in the image (left)? Most likely not. But the next image (right) looks clean, interesting, is at a proper angle and is clear. Your lead image for each lot should be your best shot.
How about this next set of photos? Which one do you think is most appealing as a bidder?
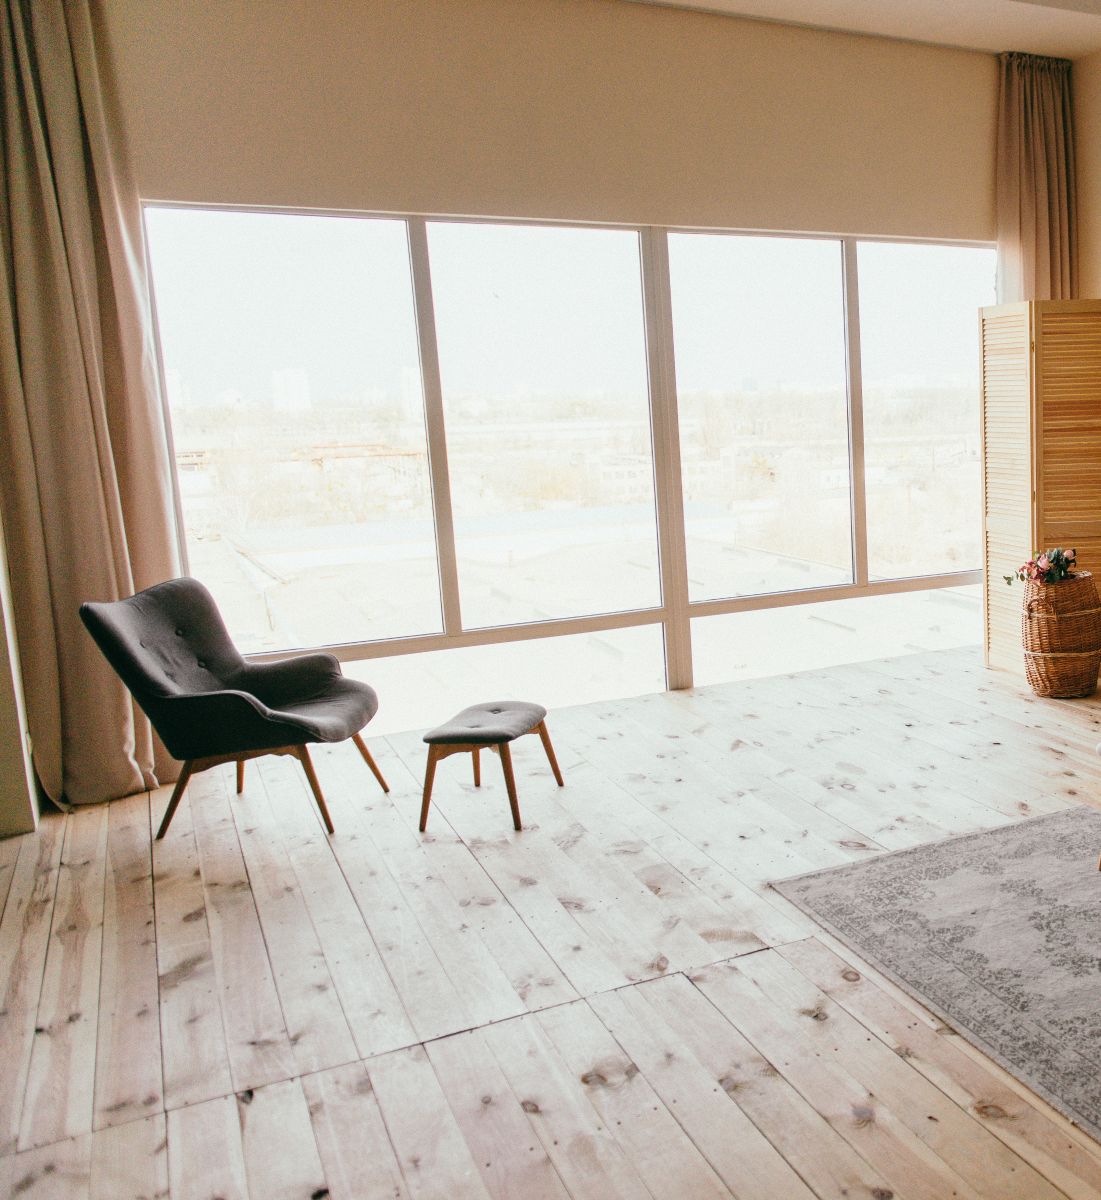
The first image is much to far away from the chair and ottoman to be of any interest to your bidders. In fact, one might even wonder the item being offered was the chair and ottoman set, the rug or the basket with flowers. The second image is much tighter, with the chair and ottoman filling most of the frame. The viewer knows precisely what is being offered and also sees more detail.
Separately, one big drawback of both of these chair photos, however, is the lighting. Notice the natural backlighting from the window that is creating a glow on the chair that prohibits the view from seeing the true color of the fabric. We would recommend that you move the chair within the room so the natural light from the window is behind you.
Don't let bad photography hold you back -- following these steps will help prepare you for your more successful online auction yet.
Snag the infographic below to share with your team!

Written by:
June 26, 2022 Updated 04:06 PM
Ready to locate an estate sale company or explore online estate auctions? Visit AuctionNinja.com. If you're new to online estate auctions, try it risk-free by sigining up here.